
主题
Program Settings
Scope: Program settings in the Admin app. Documentation checked: 2026-10-24.
Program settings control the whole program: its background, management information and interactive behavior. Set an individual image's duration, a video's volume or a child screen's position in that media item's or child screen's own settings.
For an ordinary image/video playlist, check the name, orientation and background first. Interactive settings can usually stay at their defaults. Adjust them when building touch-screen directories, remote-controlled menus or layouts with temporary full-screen viewing.
These screenshots show the current Admin app, cropped for readability and marked with red boxes. The program ID is blurred. Click an image to enlarge it.
Open the settings panel
- In Admin, open My Program and select the program to edit.
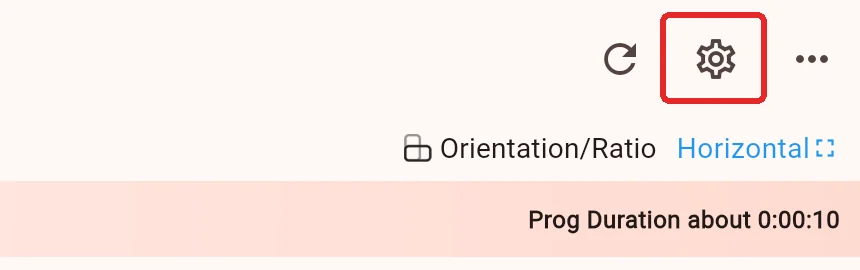
- Click the gear at the top right of the editor.
- On a large display, the settings appear in a right-side panel. Scroll to see version and time information. Use the back arrow at the top left of the panel to return to the editor.
Remember to save
Closing the panel returns to the editor; it does not save your changes. Click Save at the top right when finished. Accounts subject to approval may show Submit for Approval instead.
What each setting does
| Setting | Purpose | Needed for a simple playlist? |
|---|---|---|
| Program ID | Identify a program, copy it or help support locate it | Read-only; copy when needed |
| Description | Leave management notes for your team | Optional |
| Program Group | Organize programs by store, purpose or campaign | Useful with many programs |
| Background Color | Set the canvas background and its opacity | Set as needed |
| Auto Hide Focus / Auto Hide Time | Hide the remote-control selection outline after inactivity | For interactive programs |
| Auto Back Time | Return from an interactive page or temporary full-screen view | For interactive programs |
| Click FullScreen | Temporarily enlarge a child screen | Optional for interactive split-screen layouts |
| Program Version, Created Time, UpdateTime | Inspect program record information | Read-only |
Basic information and program groups
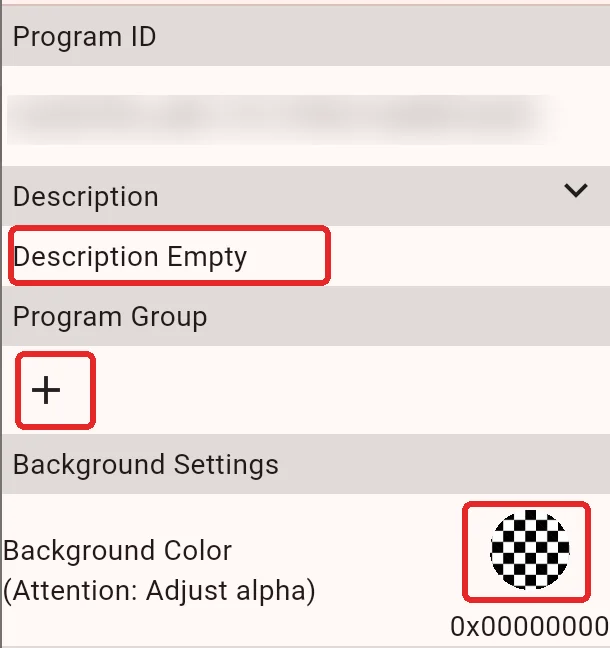
Program ID
This is the unique identifier assigned to the program. It is different from Program Name and Device ID. Renaming the program does not change this copy's ID.
Long-press the ID text and choose Copy when contacting support or using Copy from ID. Copying programs still depends on what your account can access in the selected source.
Description: notes for managers
Click the description text, or Description Empty, to open its editor. Confirm the text, return and save the program. The arrow beside the heading expands or collapses a long description.
For example: “Lobby welcome screen; update every Monday and replace campaign media for holidays.” This helps another team member understand the program's purpose and maintenance requirements.
The description is not automatically displayed on the TV. Add a text media item if viewers should see a welcome message, price or explanation.
Program Group: organize programs without changing their layouts
Click + under Program Group, select groups from the current source and confirm. One program can belong to multiple groups, such as Store Menus and Summer Campaign. Save after returning to the editor.
Assigned groups appear as labels. Removing a label with × removes the association, not the program itself. Group membership does not automatically cast the program to devices.
These similarly named features serve different purposes:
| Feature | What it contains | Typical use |
|---|---|---|
| Program Group in this panel | Multiple programs | Organizing and finding programs |
| Screen Group at the top of the editor | Multiple layouts inside one program | Matching different content to device labels for Multi-Screen playback |
| Device Group under My Device | Multiple Players | Choosing casting targets and configuring Video Wall layouts |
Background: check both color and opacity
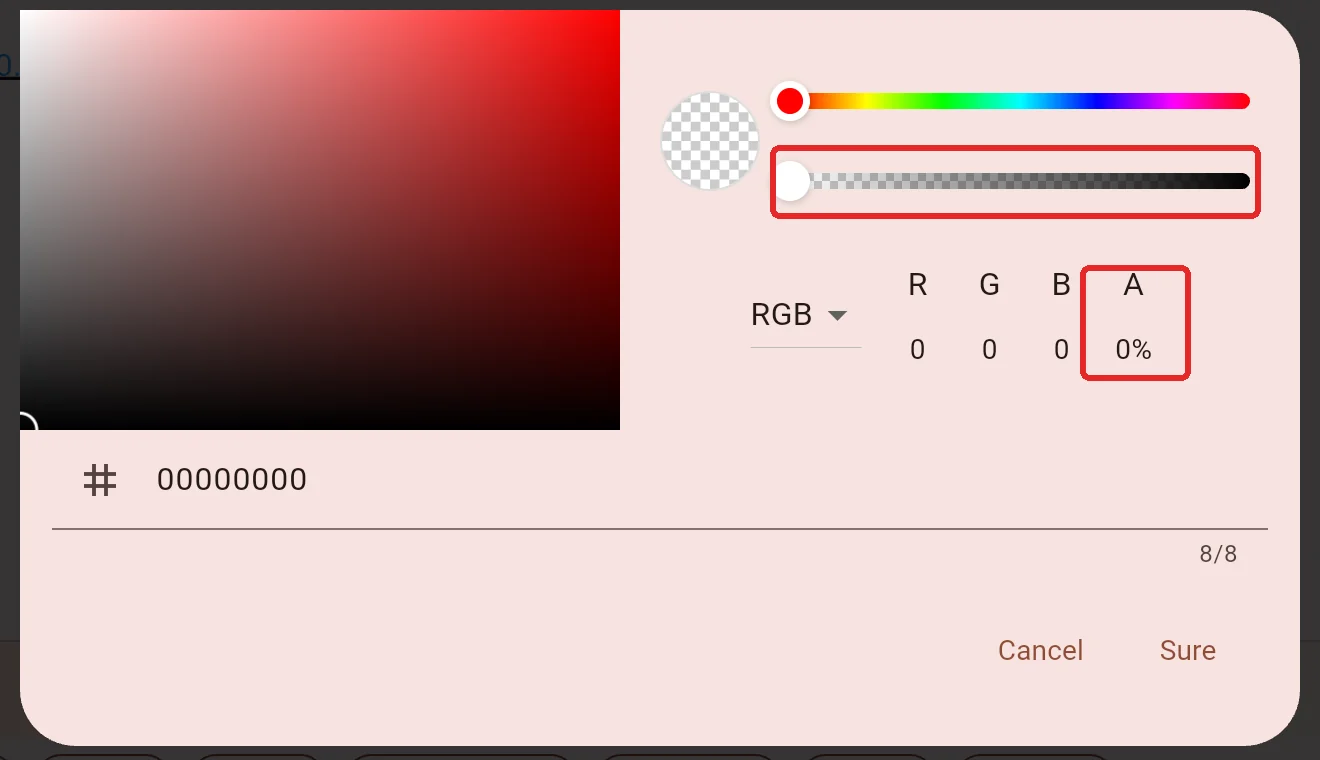
Click the color circle to open the picker. Choose a color, check A (the alpha channel), confirm, then save the program.
The background sits beneath program content. It mainly appears in areas not covered by child screens or media. Changing it does not recolor an image or remove a background embedded in an image or video.
| Desired result | Setting |
|---|---|
| A solid black or white background | Choose the color and set A to 100%, fully opaque |
| A translucent background | Choose the color and reduce A to the required opacity |
| A transparent notice strip or overlay program | Set A to 0%, and check the backgrounds of child screens and media too |
The checkerboard indicates transparency; it is not a black-and-white pattern that will play on screen. A is 0% in the screenshot, so the background remains fully transparent even when a color is chosen.
The 0x... value below the circle represents the current color. Ordinary use does not require editing it manually. See Overlay Program Playback for overlays.
Focus and interaction
These options mainly serve interactive programs, such as touch-screen directories and remote-controlled menus. Ordinary unattended playlists can usually keep the defaults.
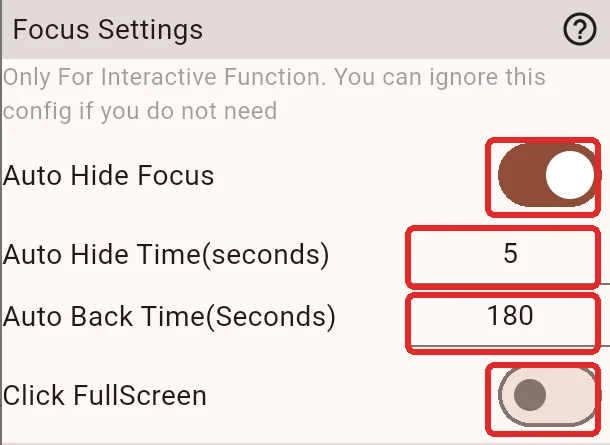
Auto Hide Focus and Auto Hide Time
The focus outline identifies the child screen currently selected by the remote. It is separate from the editor's layout selection border.
- Auto Hide off: this countdown does not hide the focus outline, making the selection easier to track continuously.
- Auto Hide on: the outline disappears after the configured period without remote input and can reappear when input resumes.
- Auto Hide Time (seconds): this field appears only when Auto Hide is on. For example,
5hides the outline after about five seconds without input.
This affects only the focus indicator. It does not hide content or stop playback. Set outline color and border appearance in Child-Screen Parameters.
Auto Back Time (seconds)
This controls returning from an in-program click-through page to the main playback view, and restoring the layout after temporary child-screen full-screen viewing. It is not a media item's playlist duration.
180means about three minutes, useful for a public directory returning to its initial display after use.60means about one minute, for a quicker return.0disables automatic return; the user must return manually.
The destination is the program's main playback view, not app exit or the Player settings home screen. Return behavior for third-party apps or system pages also depends on those apps and the operating system; this is not a universal exit control.
Click FullScreen
When enabled, clicking a child screen during playback can temporarily enlarge it to fill the program area. This makes pictures and videos easier to inspect within a split-screen layout. A configured Auto Back Time can restore the layout afterward.
For example, a product display can normally show pictures, explanations and video in separate areas, with the video enlarged when a visitor needs a closer look. Leave this off if touching the display should not change the layout.
Keep in mind:
- A media item or child screen with an existing click event executes that event first and may not enter this temporary full-screen mode.
- A child screen that already fills the program may show no additional enlargement.
- Clicking in edit mode selects the child screen for editing. Test the behavior in Preview or on a Player during actual playback.
Program version and timestamps
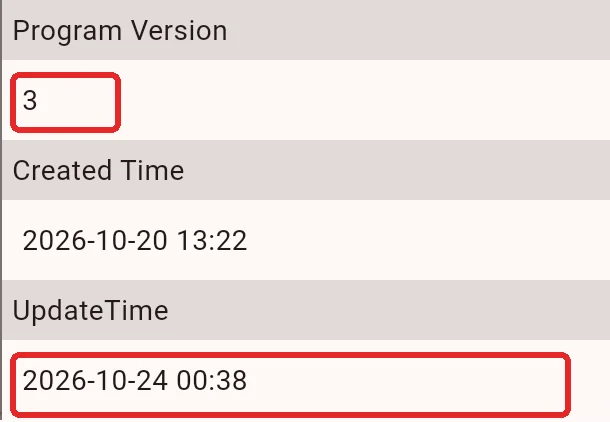
| Field | Purpose | Edit it manually? |
|---|---|---|
| Program Version | Identifies the program data format for compatibility | No. The example's 3 is not the app's 5.x software version |
| Created Time | Records when this program was created | No |
| UpdateTime | Helps check the program's recent changes | No. It is not the time a Player finished downloading or syncing |
The displayed update time can change while editing. Confirm a successful save and reopen the program to verify persistence, rather than relying on the timestamp alone.
Where to change orientation, ratio and cover
These are also program-level settings, but their controls are outside the side panel above.
Program name, orientation and ratio
Name: click the program name near the top of the editor. Use a recognizable name such as “Lobby — Welcome — Holiday Campaign.” The name is for management and does not automatically appear in the playback picture.
Orientation and ratio: click the orientation value beside Orientation/Ratio near the top of the editor.
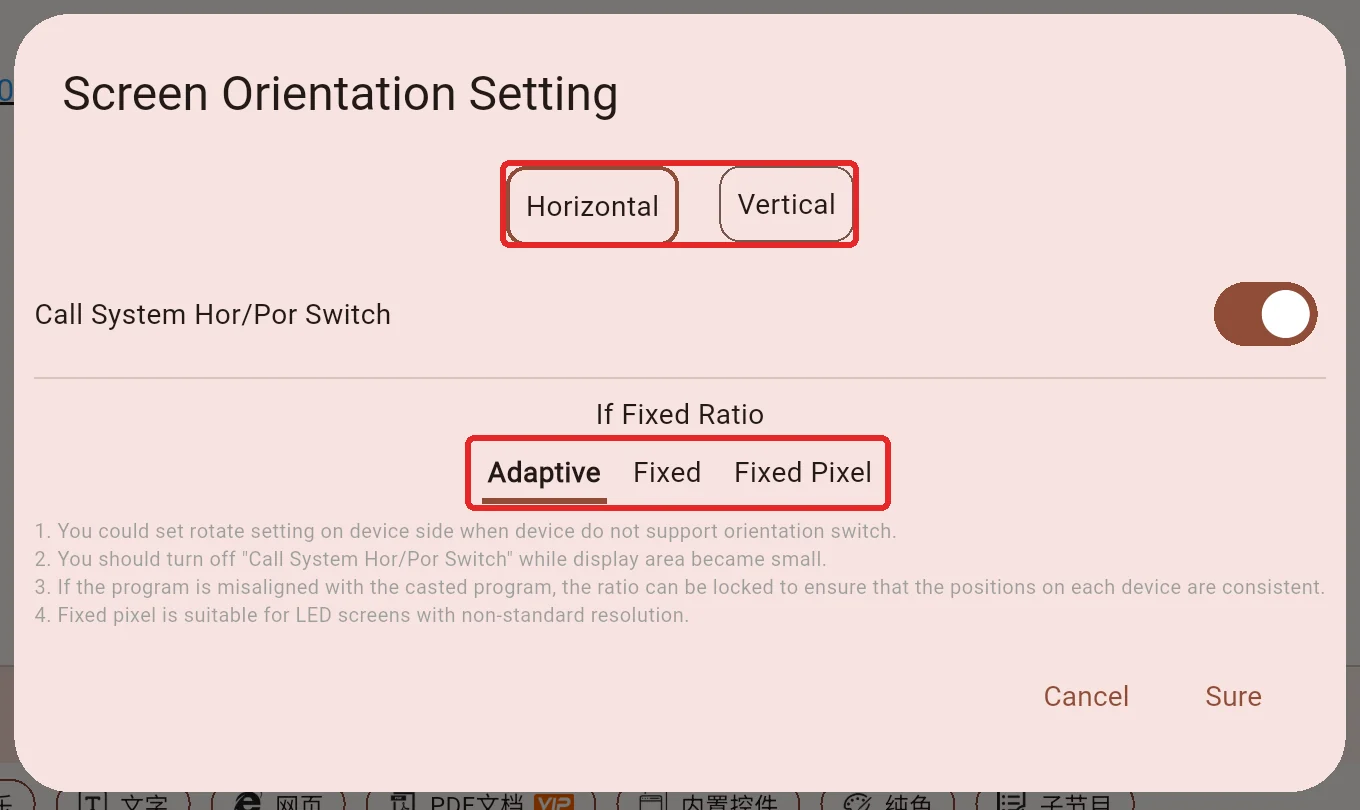
| Option | Purpose and suitable use |
|---|---|
| Horizontal / Vertical | Choose according to the display's physical installation |
| Call System Hor/Por Switch | Let Player request system orientation changes. Some TVs do not support this; if switching produces an incorrect display area, turn it off and set orientation on Player instead |
| Adaptive | Arrange content within the available display area; suitable for ordinary displays |
| Fixed | Use a chosen aspect ratio, such as 16:9 for landscape content, to preserve layout consistency across devices. Mismatched screen ratios can leave borders |
| Fixed Pixel | For non-standard LED resolutions and similar setups; enter width and height according to the actual output requirements. Ordinary TVs usually do not need it |
A ratio change can affect the whole layout. Preview before saving and verify on the target device. See Screen Orientation for Player-side orientation settings.
Generate a program cover
The current app generates the cover from Preview, rather than selecting a cover image in the side panel.
- Return to the program editor and click Preview at the bottom.
- Wait for the picture you want to use as the cover.
- Click Generate Cover at the top right.
- Click End Preview to return to editing.
- Click Save to persist the generated cover.
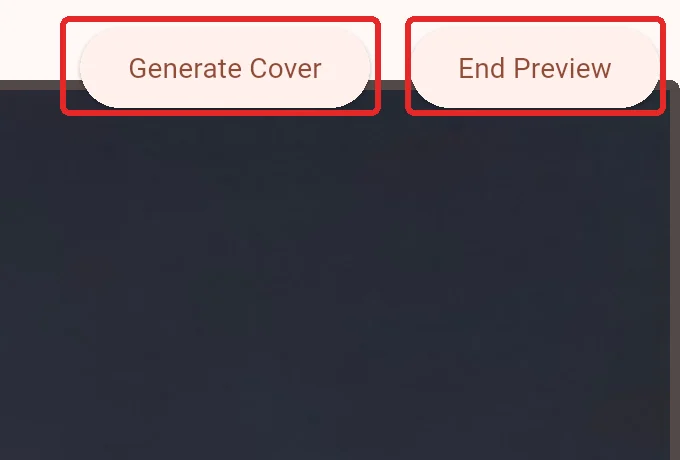
The cover is the program-list thumbnail. It does not replace program media or change playback content. Generating a cover and exiting without saving discards that cover change too.
Save and update the Players

- Close the panel and preview the program in the editor.
- Click Save at the top right and wait for confirmation. If the action is Submit for Approval, complete your account's approval process.
- A program that has not been cast still needs to be assigned to devices or device groups.
- An existing cast uses the new settings after the Player is online and has synchronized the updated content. For LAN programs, check that the corresponding service is reachable too.
Local copies created by Online Peer-to-Peer reception or USB import do not automatically follow later edits to the original program. Send or import the updated program using the corresponding casting method.
If the app warns about unsaved changes when leaving, cancel the exit and save to keep them. Confirming the exit discards the current unsaved changes.
Troubleshooting
| Issue | Check first |
|---|---|
| Changing the background has no visible effect | Is A at 0%? Is the canvas covered by opaque media or child screens? |
| Auto Hide Time is missing | Enable Auto Hide Focus first |
| You want images to change every ten seconds | Set duration in the image's own media settings; Auto Back Time does not control the playlist |
| Clicking does not enlarge a child screen | Check the switch, Preview/playback mode, existing click events and whether the child screen already fills the program |
| You want daily start/stop times or a playback sequence | Use Start/End Time/Priority/Playback Mode when casting. See Playback Plans |
| Admin shows the change but the TV still looks the same | Check saving/approval, synchronization and whether the Player is showing this program or a separate copy |