
主题
Sub-screen Settings
Scope: Settings of the selected sub-screen in the Admin app. Documentation checked: 2026-10-24.
A sub-screen is a playback region inside a program. These settings control the appearance, media transitions and interaction of the selected sub-screen. Other regions keep their own settings.
For posters, menus and unattended playlists, start with the background, transitions and each media item's display duration. Use fixed playback for presentations, and add focus and click actions for interactive screens.
Open the settings panel
- Open the program in the Admin app.
- Select the region in the sub-screen list. Its card shows the available action icons.
- Click the blue pencil at the bottom right of the card. Clicking an already selected card also opens its settings.
- Scroll inside the panel to view background, transitions, advanced playback, focus and click actions.
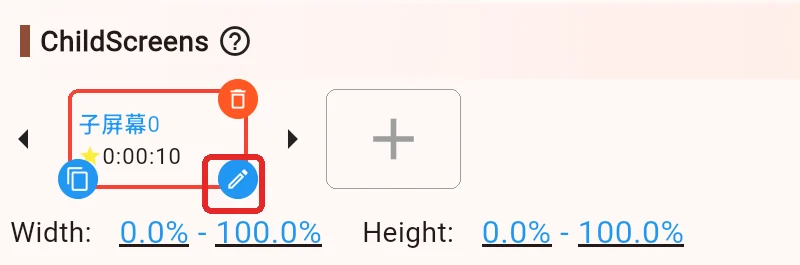
On a large display, settings open in a panel on the right. These screenshots are cropped and enlarged, with red frames around the relevant controls. Click an image to view it at full size.
Save the program afterwards
Changes in this panel are part of the current program edit. Return to the editor and click Save, or follow the Submit for Approval flow if your account requires review. See saving and updating Players.
Find the setting you need
| What you want to do | Where to look |
|---|---|
| Give the region an identifiable name | Name |
| Prepare different layouts for different devices | Group, matched to device labels |
| Change its background, spacing, corners or rotation | Background Settings |
| Use smooth transitions or direct cuts | Animation and Slide Duration |
| Keep an image on screen for 10 seconds | That image's media settings |
| Control a primary region with a remote | Set Main Screen |
| Prevent visitors from swiping through media | No Gesture Slide |
| Show media in random order | Random Play |
| Advance pages manually during a presentation | Fixed Play |
| Select regions and confirm actions with a remote | Focus Settings and click actions |
Position, size and layer order are adjusted in the program editor. See editing sub-screens.
Basic information: ID, name and group
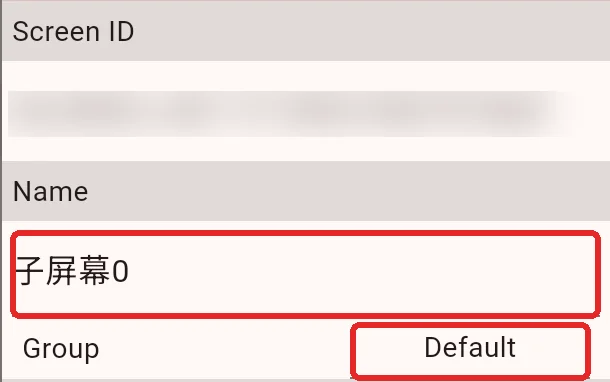
Sub-screen ID
The system assigns a unique ID to each region. It identifies the sub-screen for copying by ID or troubleshooting. It differs from the program ID and device ID, and stays the same when you rename the region. Long-press the text to select and copy it when needed.
Name
Click the name field to edit it. Names such as “Left product video” or “Bottom announcement” make regions easier to identify in the list. The name does not automatically appear to viewers; add text media if you need a visible caption.
Group
This is a screen group: a way to organize multiple layouts in one program. Ordinary single-screen playback, same-content synchronization and automatic video-wall partitioning usually use the default group.
Click the current group name and enter the desired screen-group name. An empty name means the default group. Changing it moves this sub-screen into that group and switches the editor to the destination group.
For example, a device labeled Left can play the screen group named Left. Keep the names consistent; see screen groups for the complete workflow.
Program groups organize multiple programs, and device groups organize multiple Players. This field organizes sub-screen layouts inside one program.
Background: color, rotation, corners and padding
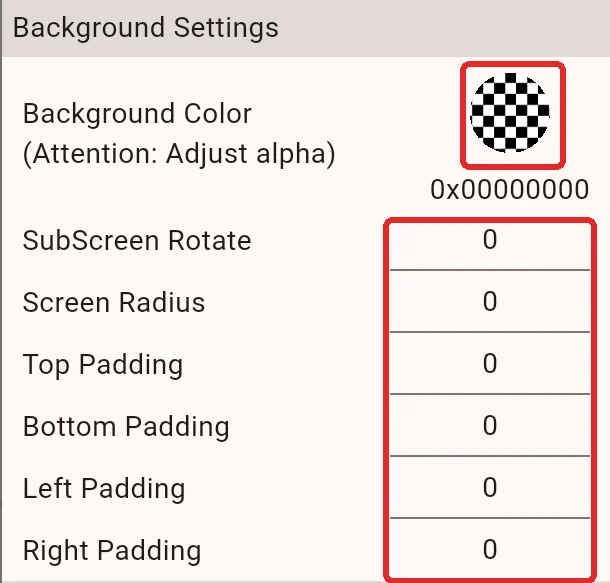
Click a numeric value to edit it and confirm. Adjust one setting at a time, then preview the result.
Background color and opacity
Click the color circle to open the picker. The background belongs to this region and is visible where media does not cover it, including any padding around the content.
- For a solid black, white or brand-colored background, choose a color and set A to 100%.
- To reveal the program background or content underneath, lower A. 0% is fully transparent.
- The checkerboard in the color circle indicates transparency; it is not a background pattern shown during playback.
The default background is transparent. Choosing a color while leaving A at 0% will not make that color visible. Opaque images and videos can also cover the background.
See program background settings for the layers: the program background is underneath, the sub-screen background fills its region, and media appears above it.
Sub-screen rotation
Rotate this region and its content between 0–360°. A value of 0 means no rotation; 90 turns the region by a quarter turn.
Rotation does not rearrange nearby regions. Content close to the canvas edge may extend beyond the visible area, so check its position and size as well. For the orientation of the whole TV, use the Player orientation settings.
Screen Radius
Controls how rounded the corners are. 0 gives square corners. Rounded corners work well for information cards, colored menu blocks or video panels.
Start with a small value such as 10 or 20 and preview it. A large radius can cut off content near the corners. This affects the region and clips the content edges; it does not modify the original media file.
Top, bottom, left and right padding
Padding creates space inside the region. All four values default to 0. Increasing them insets the content while leaving the region's outer position and size unchanged.
For example, setting all sides to 10 creates a gap between the media and the region edges. An opaque sub-screen background becomes visible in this gap.
To move the whole region to the right, change its position in the editor. Large padding values can squeeze the content area and make text or images harder to display.
Animation, slide direction and Slide Duration
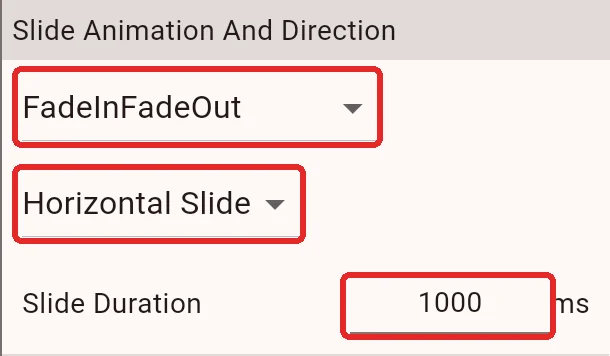
These settings mainly apply when a region contains multiple media items and changes to the previous or next item.
Transition animation
| Animation | Intended effect and use |
|---|---|
| None | A direct cut; useful for a simple appearance, weaker devices or fewer animations |
| Normal | Slides content along the selected axis; useful for ordinary playlists |
| FadeInFadeOut | Gradually replaces one image with another; useful for posters and promotional images |
| ScaleAndFade | Combines scaling and fading during the change |
| ZoomIn | Introduces the next item with a zoom-in effect |
| ZoomOut | Shrinks the outgoing item during the change |
| Accordion | A folding-style transition for a more noticeable change |
| 3D | A transition with a three-dimensional rotation; preview it on the target Player |
| Depth | The current version displays this as a normal transition |
A transition does not continuously animate a still image. With only one item and no page change, there is usually no visible transition to show.
Horizontal Slide / Vertical Slide
Chooses the paging axis: left/right or up/down. It also determines the direction of manual swiping when gestures are allowed.
This does not change the program's landscape or portrait orientation. Effects without obvious movement, such as fading, may look similar on either axis.
Slide Duration: measured in milliseconds
Slide Duration controls how long the transition from one media item to the next takes. The default is 1000 milliseconds, or about one second.
| Value | Transition time |
|---|---|
300 | About 0.3 seconds; a faster change |
1000 | About one second; the default |
2000 | About two seconds; a slower transition |
Set image display time on the image itself
To change images every 10 seconds, set each image's display duration to 10 seconds. Entering 10 in Slide Duration means a 10-millisecond transition. Media playback/display duration and transition time both affect the playlist timing; see image media.
For same-content synchronization or multi-screen playback, keep the relevant media durations, order and transition settings consistent. Transition duration is not a device synchronization offset.
Advanced Play Settings
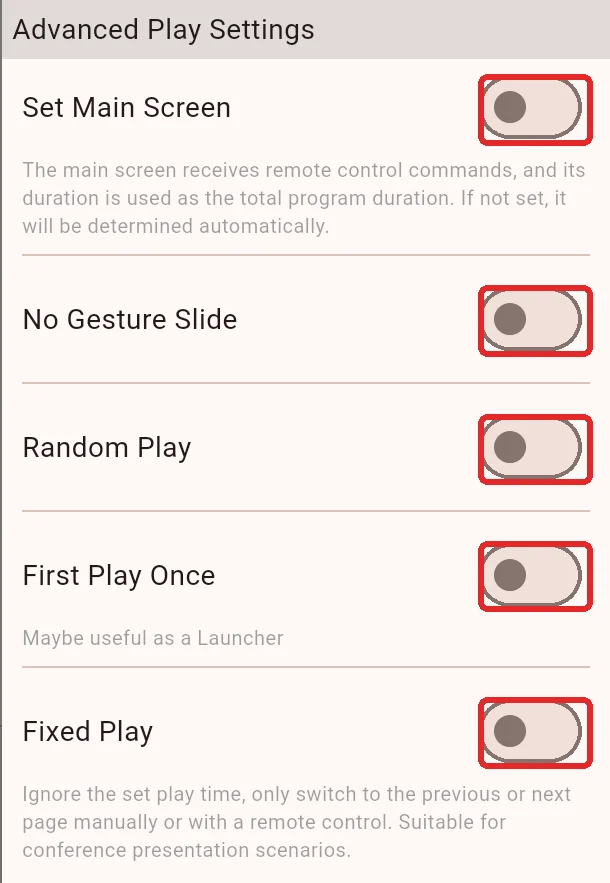
Set Main Screen
Selects the primary playback region. It receives the relevant remote paging commands, and the total duration of its media provides the program duration. The system chooses a main screen automatically if you do not specify one.
For a program with “product videos + announcement strip,” choose the video region as the main screen if the remote's left/right buttons should change the product videos. This setting does not bring a region to the front or enlarge it.
Only one sub-screen per screen group can be explicitly selected as the main screen. Enabling another region clears the previous selection in that group. Different screen groups have their own main-screen selections.
No Gesture Slide
Enable this to stop visitors from swiping this region to another media item. It is useful on public touch screens where casual swipes should not change the content.
It does not stop automatic playback, block click actions or disable remote paging. Check the touch behavior on the actual device when using scrollable web pages or long images.
Random Play
When disabled, media follows the list order. When enabled, media is selected randomly, which can suit image collections with no required sequence.
An item may repeat; this is not a guarantee that every item appears once before a new shuffle. Leave it off for a fixed story sequence, presentations or synchronized playback.
First Play Once
This option was intended for opening content that plays once before the remaining playlist. The current version does not apply this playback control, so leave it disabled. Do not rely on it to ensure an introductory video appears only once.
Fixed Play
Stops the region from automatically advancing according to its media durations. Change pages manually by swiping or using a remote. This is useful for presentations or guided explanations.
It controls paging between media items; it is not a video pause/play button.
- For touch paging, leave No Gesture Slide off and swipe along the selected axis.
- For remote paging, select the intended region as the main screen and test the left/right buttons.
- For unattended playlists, normally leave Fixed Play off so the region can continue advancing.
Focus Settings and click actions
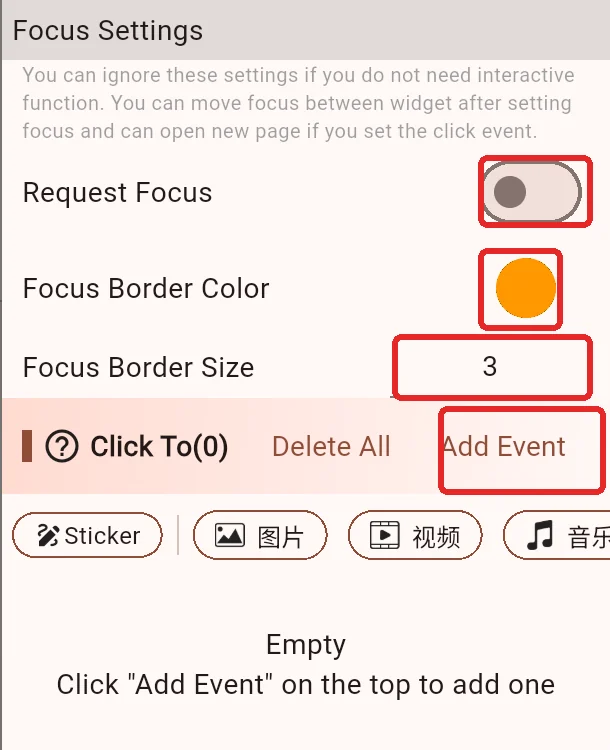
These controls mainly serve interactive programs. Ordinary unattended playlists can usually keep the defaults.
Request Focus
Allows this region to participate in remote focus navigation. During playback, users can move focus to it and press the confirmation button to run its configured click action.
Enable it for regions that users should operate, such as menu buttons. Decorative backgrounds or labels usually do not need it. Disabling focus does not by itself disable touch clicks; touch behavior still depends on the configured actions.
Focus Border Color and border size
These settings make the currently selected region easier to see. Choose a contrasting color and check its opacity; a fully transparent color will not provide a clear focus indicator.
The default size is 3. Start small, as a large focus effect may obscure nearby content. It appears when the region has focus; it is not a permanent decorative border or the editor's selection outline.
Automatic focus hiding is configured for the whole program in program focus settings. This panel determines which regions participate and how their focus indicator looks.
Click actions / Add Event
Use Add Event at the bottom of the panel, choose an action and configure it. Examples include opening content, a web page or a child program, or using a screen-jump widget to select a media item in another region.
This list configures actions for the whole sub-screen region. To give different images different destinations, add actions to those individual media items instead. Enabling focus alone does not create a destination.
Return to the program editor and test in Preview or on a Player. Clicking a region while editing mainly selects it for editing, so it does not demonstrate the playback interaction.
Common scenarios and troubleshooting
| Scenario or problem | What to set or check |
|---|---|
| Normal image/video playlist | Fixed Play off; choose a transition; set each media item's duration |
| Presentation with manual page changes | Fixed Play on; confirm touch or main-screen remote paging works |
| Background color is invisible | Check whether A is 0% or opaque media covers it |
| Images are cropped but should be fully visible | Check the image's display mode; padding and background do not replace Contain mode |
| Swiping does nothing | Check No Gesture Slide, the slide axis and whether you are in Preview/playback |
| The remote changes the wrong region | Check which region is the main screen in the current screen group |
| The region stops advancing automatically | Check Fixed Play, media count and individual media durations |
| No focus indicator | Check focus participation, color opacity and the program's automatic focus hiding |
| The TV still uses old settings | Confirm Save/approval has completed, then synchronize or cast again |
Preview the result, save the program and confirm the Player has received the update. Local copies received through online point-to-point casting or USB import must be sent or imported again using the corresponding method.